mafief: (Default)
New mug!

Salamander mug Salamander mug Salamander mug

Mom has a new mug type which is essentially a paper cup shape but upside down. She made me one so I could use the sgraffito technique to scratch out leaves and salamanders. I wanted to go for a forest floor look with layers of leaves and salamanders peeking out from under the leaves. I’m absolutely in love with this mug.

If you click on the image it’ll take you to my flickr account and you can see pics of the mug in progress.

sgraffito

Apr. 29th, 2020 09:08 am
mafief: (Default)
I've been trying to find time and opportunity to try the sgraffito pottery technique for a while and finally had the chance. The technique involves painting a glaze on damp clay and using scraping tools to remove the black. For my first attempted I tried scratching out a Shaggy Mane mushroom (Coprinus comatus) on a scrap piece of clay.
Untitled

Looked good enough, so I scratched it on a mug.
In progress:
Untitled Untitled Untitled

Finished:
Untitled Untitled Untitled

I really like this technique. I like the scratched look on the places where the black is removed and the details in the mushrooms. It was also a lot of fun to make. It's a very forgiving medium since I made a mistake and was easily able to fix it. So yah, I abso-fraggin-lutely want to try it again.

Next Batch

Sep. 9th, 2019 02:45 pm
mafief: (Default)
I’ve made a few pottery posts this year, I’ve decided I’m fine with it. My creative pottery muse is having fun. I’ve worked on a few new mugs and sugar bowls.
(Ignore the small images. I'm not fighting with DW to figure out how to make them larger today. They are thumbnails so you can get a close up view if you want.)

I continued with the bee theme and I wanted to etch a bee on a hexagon sugar bowl. I don’t sketch well enough or confidently enough to free hand it, but I’ve got mad tracing skills. ;)


Next up were sets of mugs for friends. I’m thrilled with out these have turned out thus far. They went through further refining and smoothing out after the pic was taken, but I forgot to update my pics. I had different challenges this time, so it was fun to figure out how to make things work. The large writing mug was more technically challenging than I expected, but that was still fun. I had to erase a few times because it didn’t look right. The large mug with small writing was also difficult because I made this design before and replicating something can be tricky. I didn’t have the gitters that day, so I’m happy with how the writing turned out. The earthenware clay mug was the first time I’ve tried little sketches, worked this technique on earthenware clay, and wrote on a curved surface.


Everything is in the process of drying or through the first firing. I’m totally looking forward to the final products.
mafief: (Default)
The mug survived the firing and I haven’t broken it yet! Go me. :)


I am beyond pleased. One of my favorite parts is getting the pieces back. I have an idea of what I want, but clay and glazes does whatever it wants and the outcome is a surprise. My mom stained the outside in a dark chocolate and the inside glaze is a really light tan with darker tones throughout. The pics do not do the inside glaze justice. It is really subtitle. The bee body on the handle could have been a touch darker, but I’m still liking it.

Drinking from a hexagon is an adventure. I just need to drink from one of the points and I don’t get covered in liquid. Drinking from a point doesn’t bother me at all, so I’m still happy. We’ve made squareish ones before, so it’s sort of like that. It’s a little on the small end and fits just about 6 oz; it could have been a touch bigger. The handle feels great and I’m very happy I spent the extra time to smooth the edges. The etching on the mug feels perfect when I rub my fingers over it.


Another glamour shot, because why not?


So here is my writing tribute mug series thus far. I haven’t decided if I like the black or brown stain better for writing. I don’t think black would have been right for the honeycomb mug, and I don’t think brown would have worked for the parchment mug.


There will be more in this series as well as me trying out sgraffito mushroom design (similar to this). My mom and I are working on another mug design and it needs help.

These were our first attempts and they just are wonky and aren’t right for the carving I want to do. More fun to figure out!
mafief: (Default)
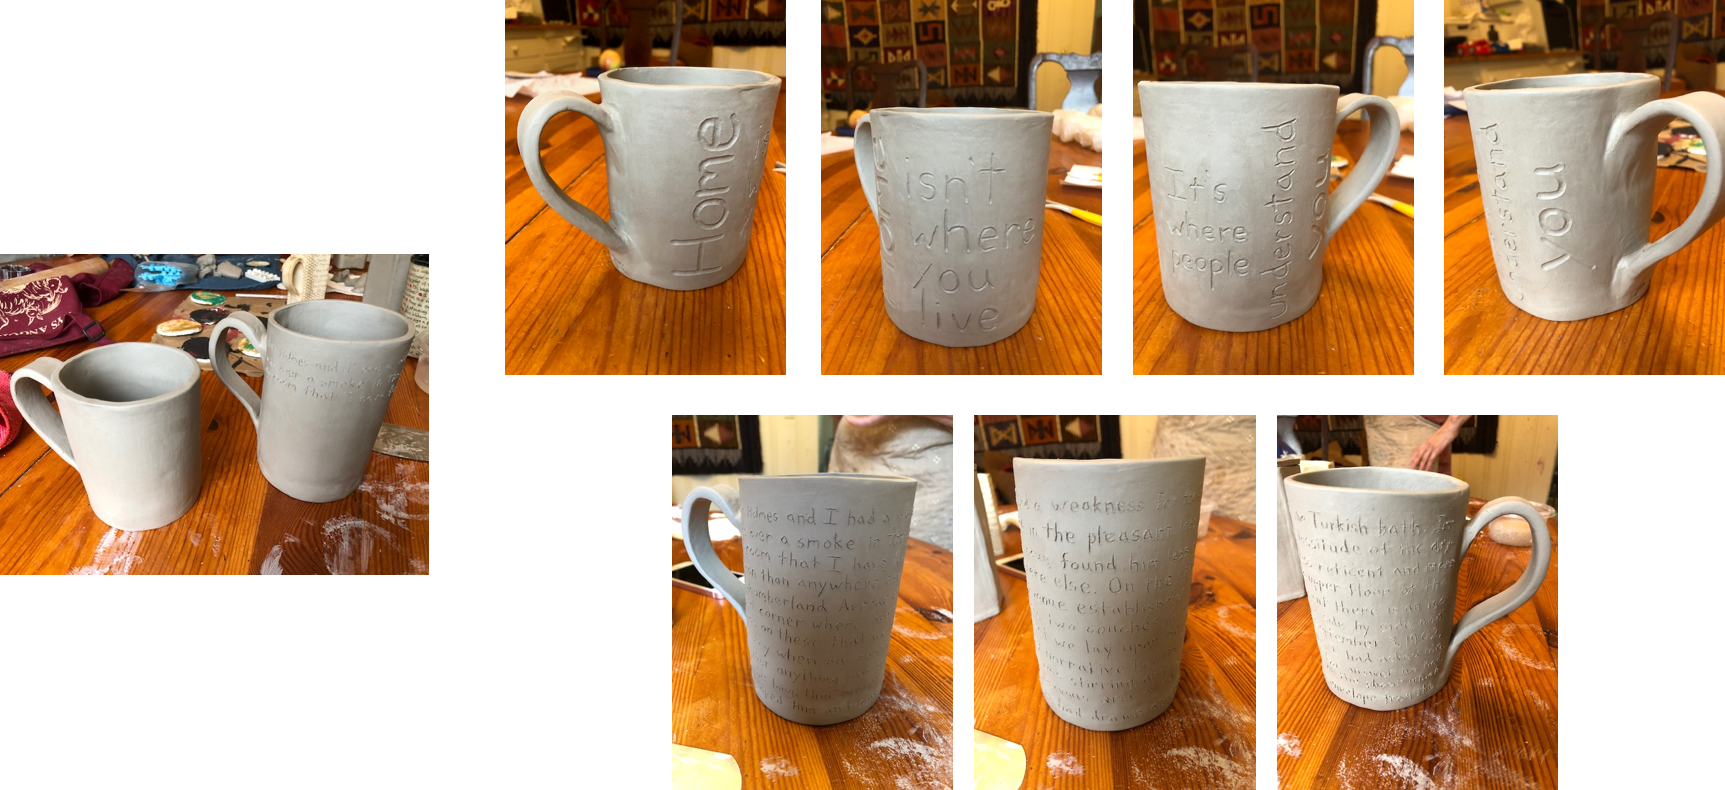
My mom and I are collaborating on mugs again. She is done with her ski season and has time to think about pottery. I have three mugs planned thus far. First is a honeycomb inspired which I have pics of below. The second and third will be of a new mug design and more info on that later.


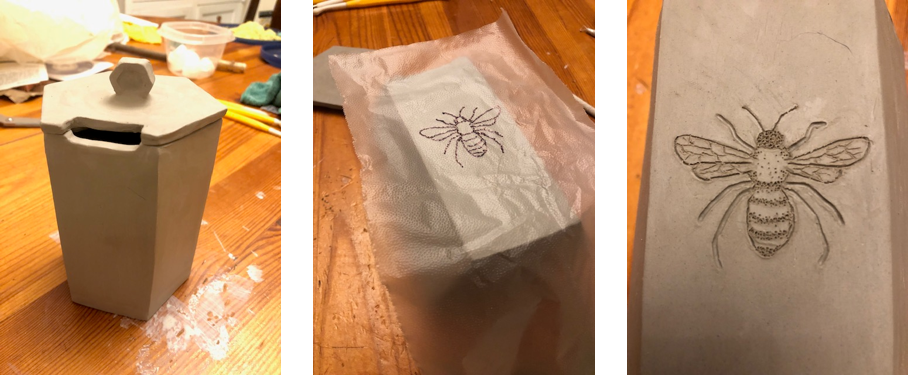
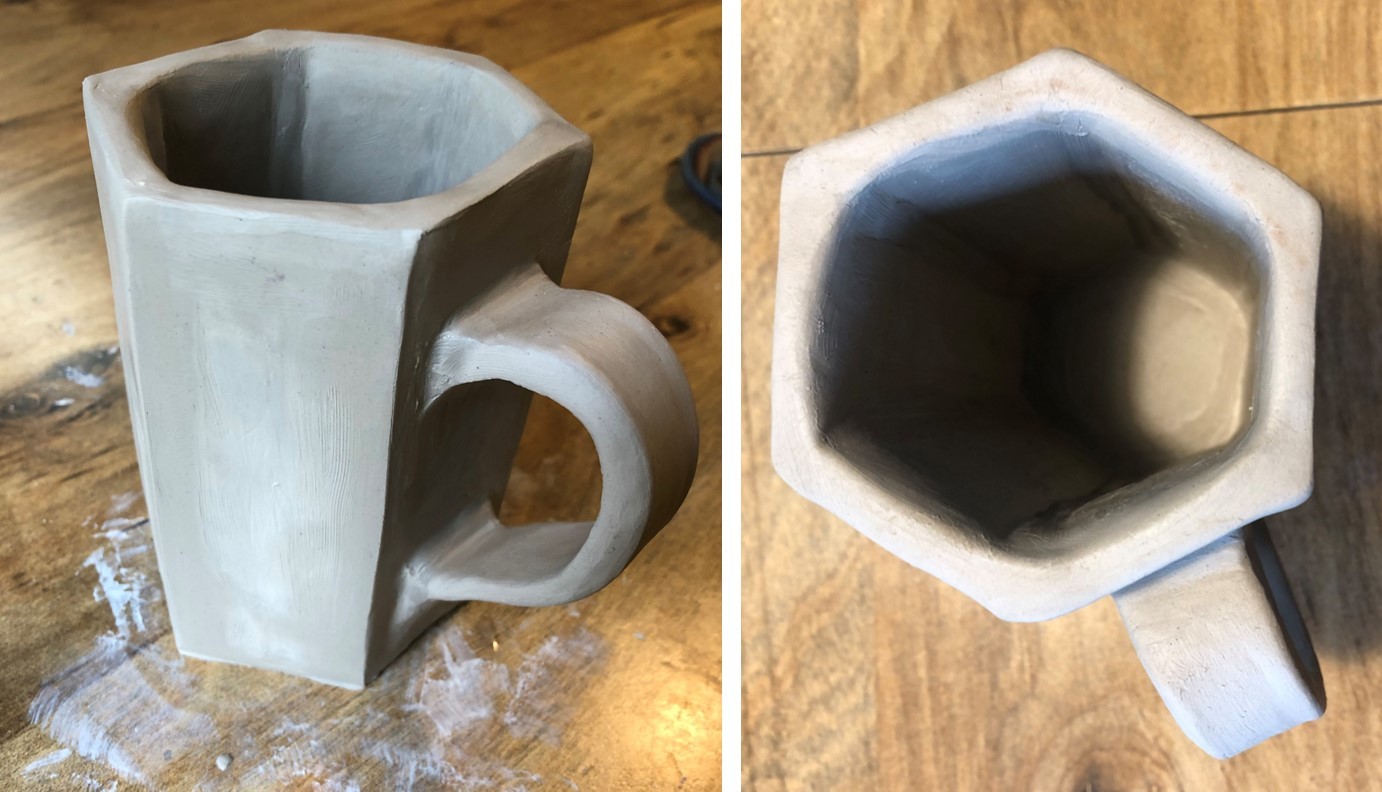
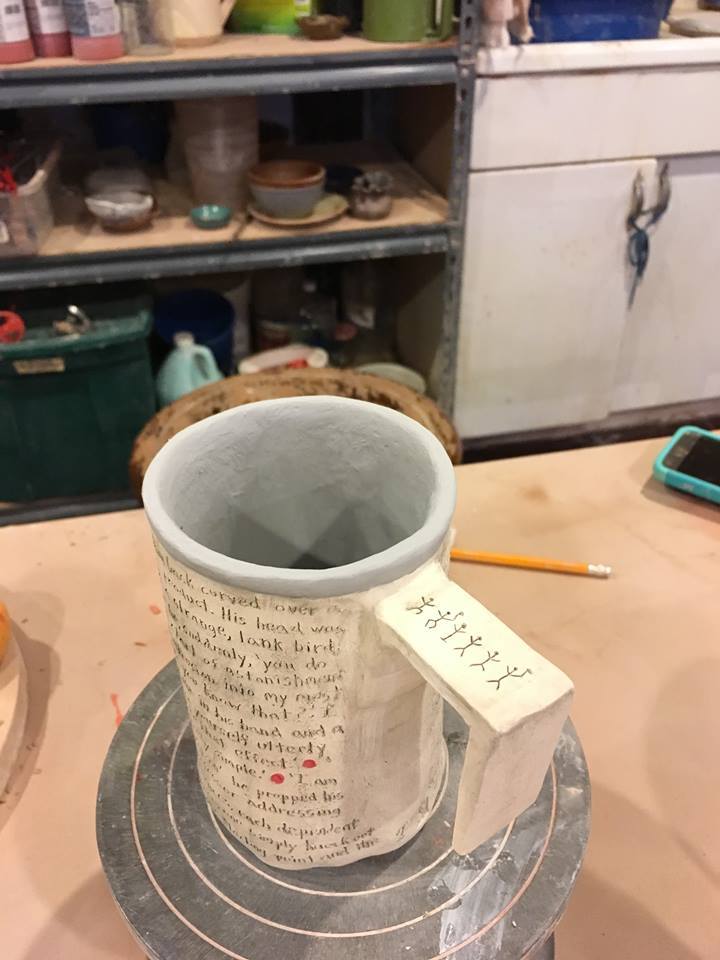
The base mug before I carved. I spent about an hour smoothing the sides and making it square. For her first constructed hexagon ever, she did really well. (Note the clay smear on my mom's table. She's a very understanding mother of her child's creative messes. ;))


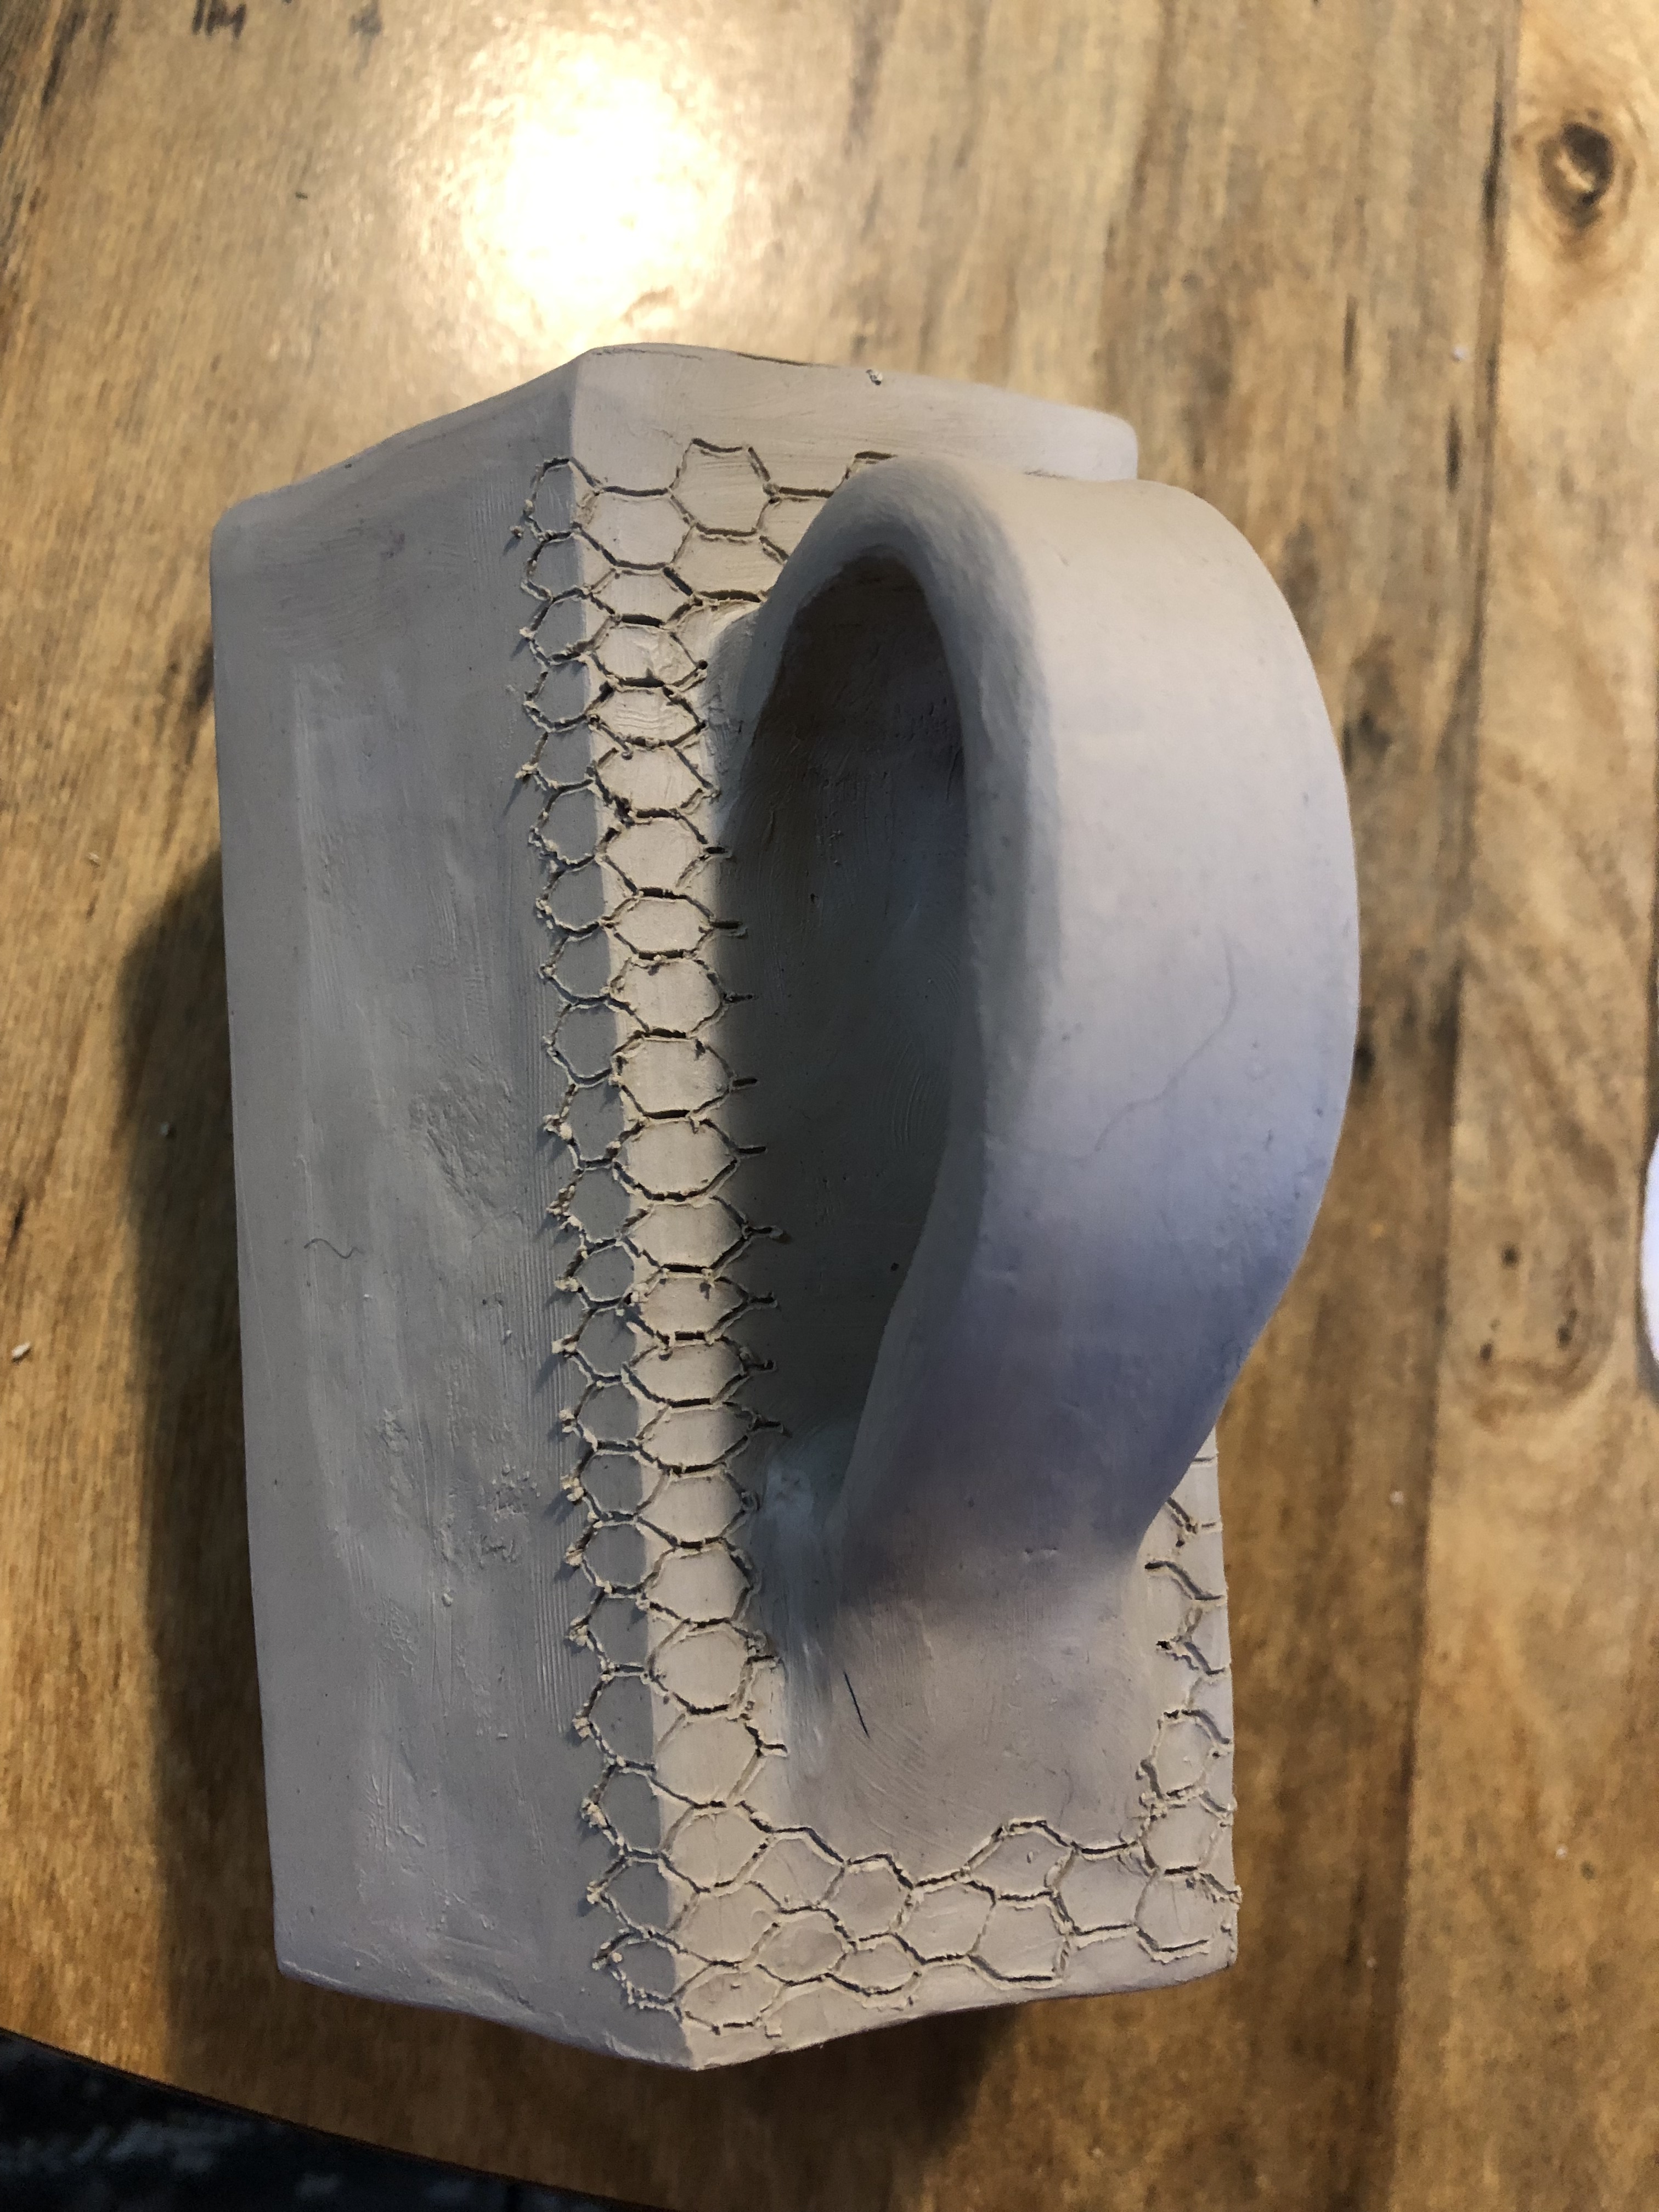
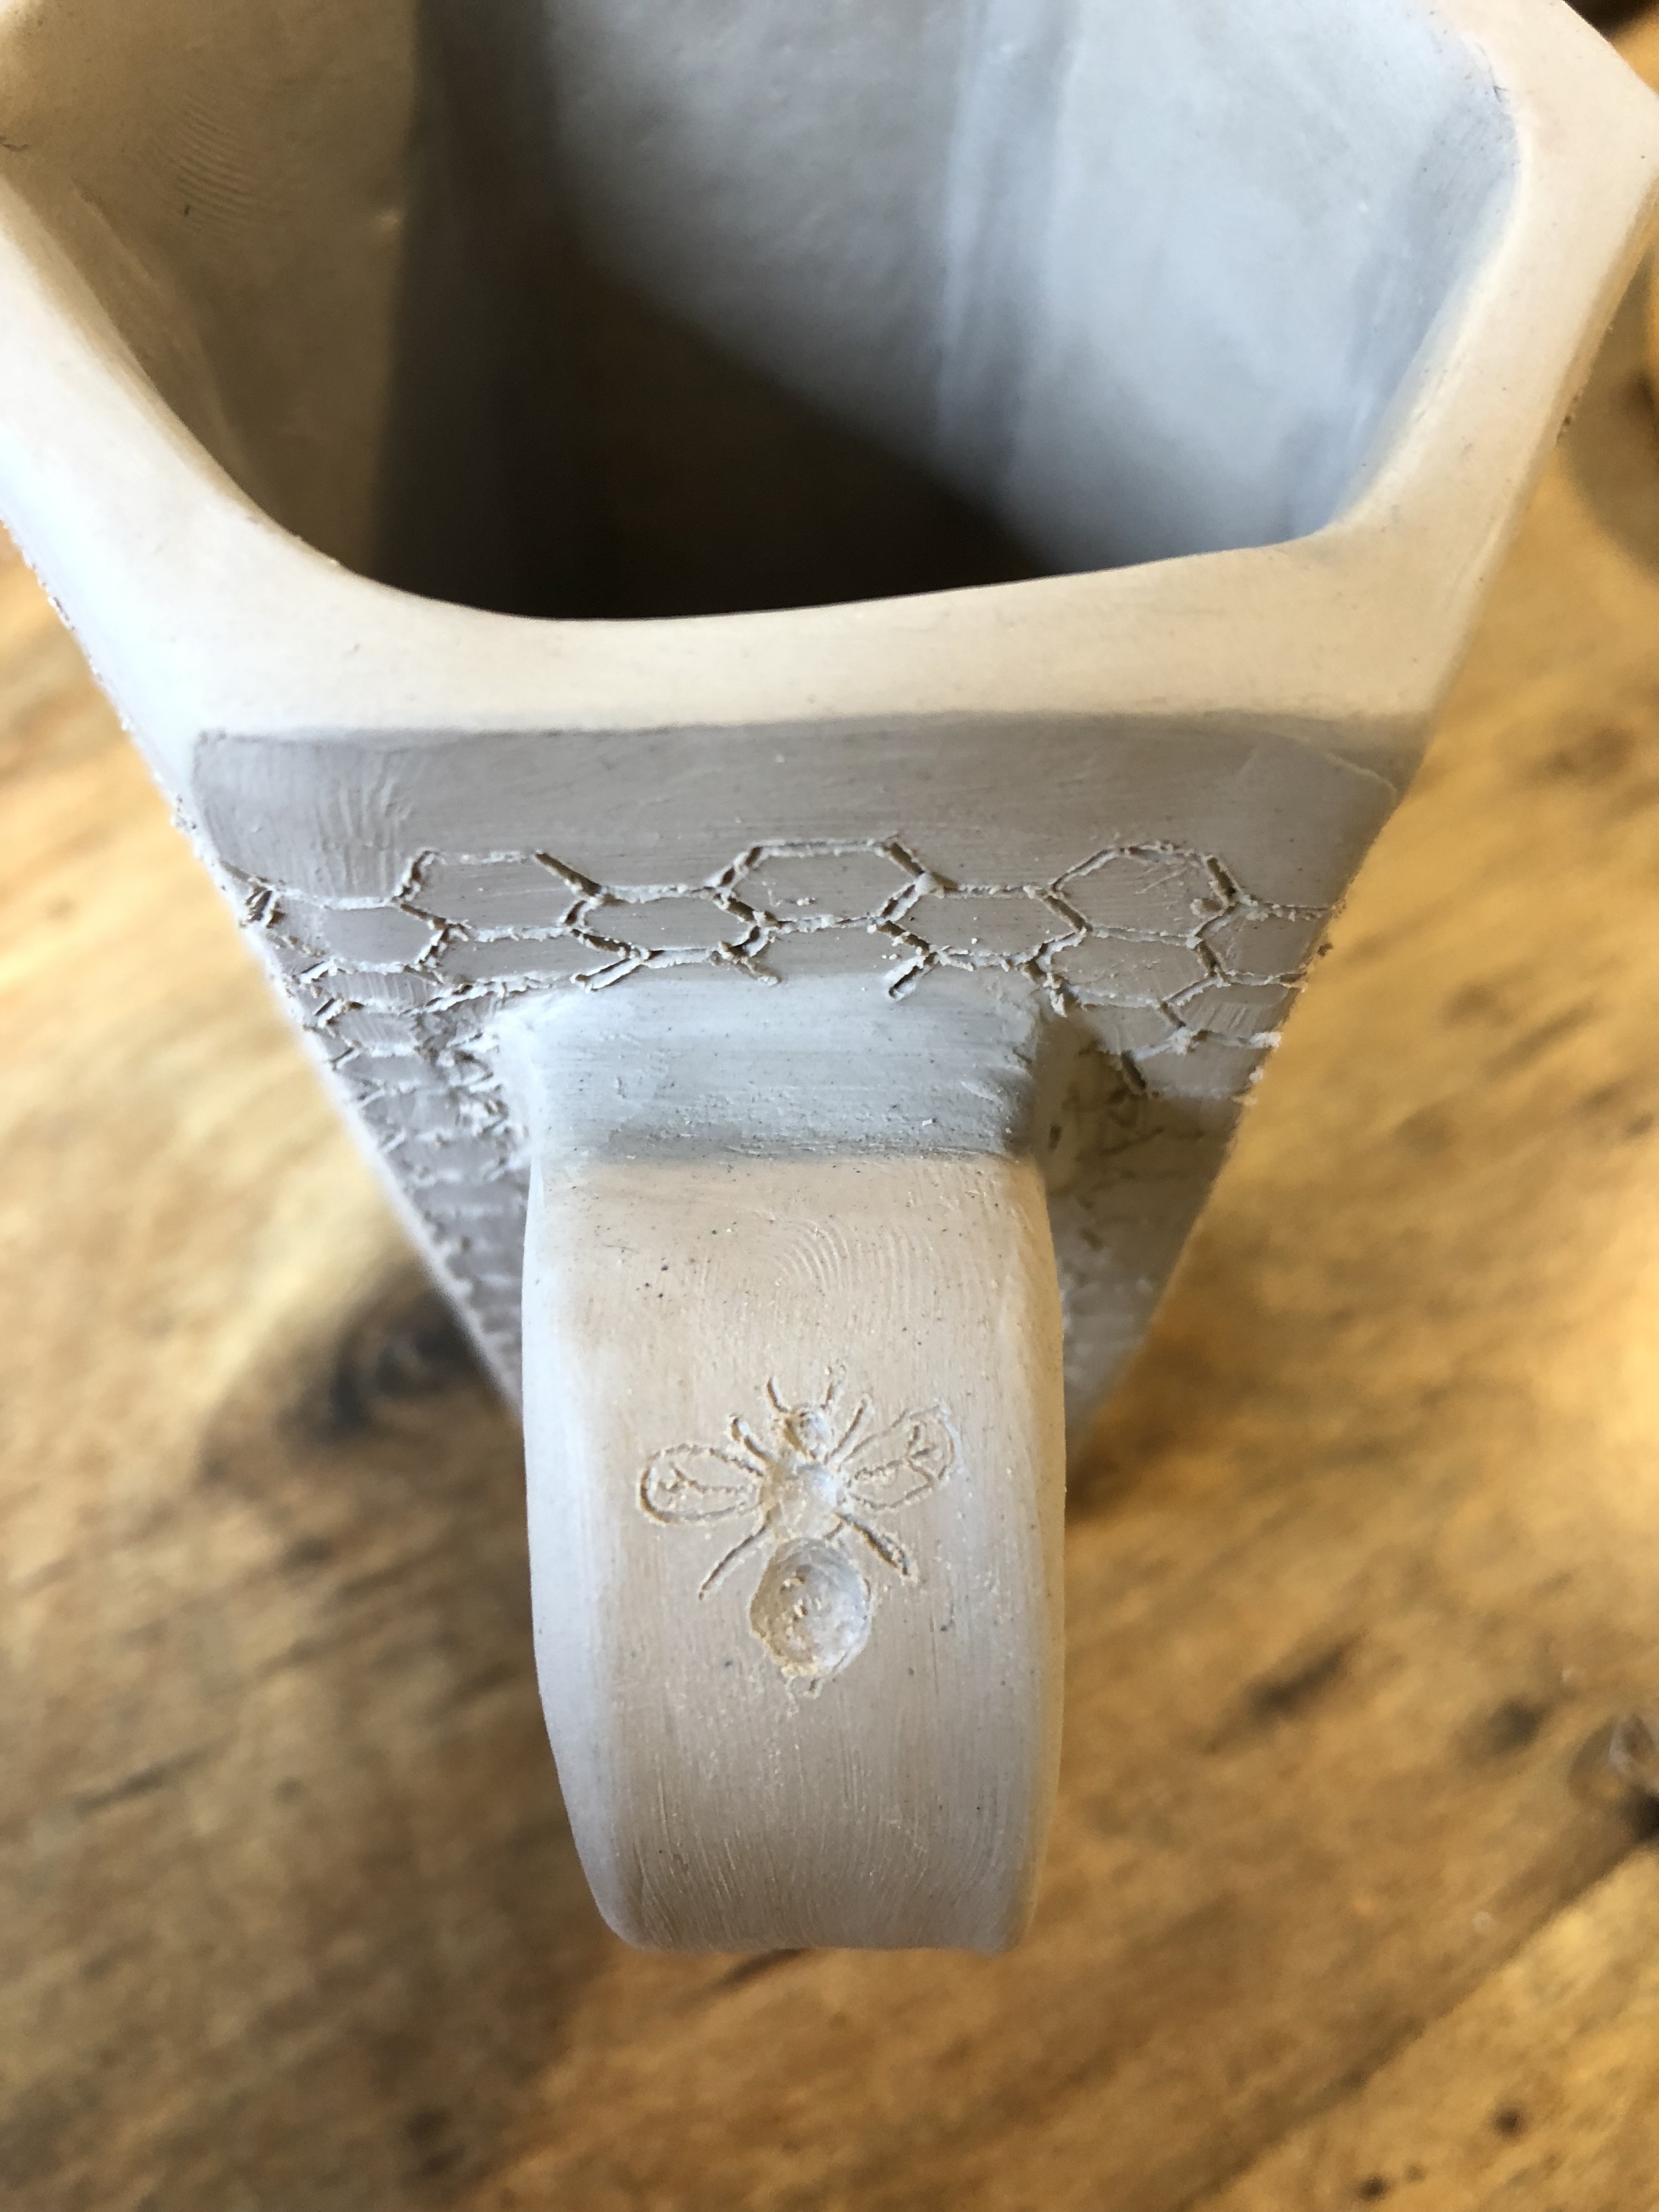
Beginning the carving around the handle. I like honeycombs and how regular they are. I was inspired by a partially filled hive frame and how they hexagons are formed around things. Carving was fun this time around. I had too much coffee that morning and was shaking more than I would have liked. Some rows of the combs are a little elongated, but oh well. The combs maybe look a little bit like snake skin, but I’m still pleased with the overall look.


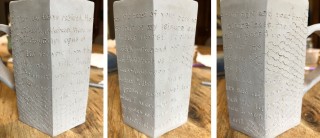
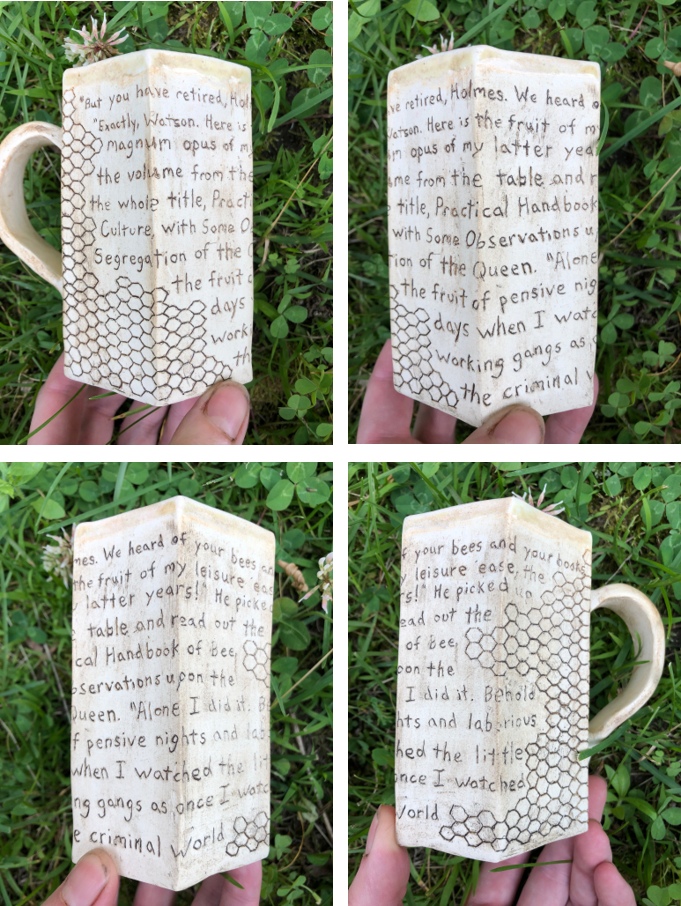
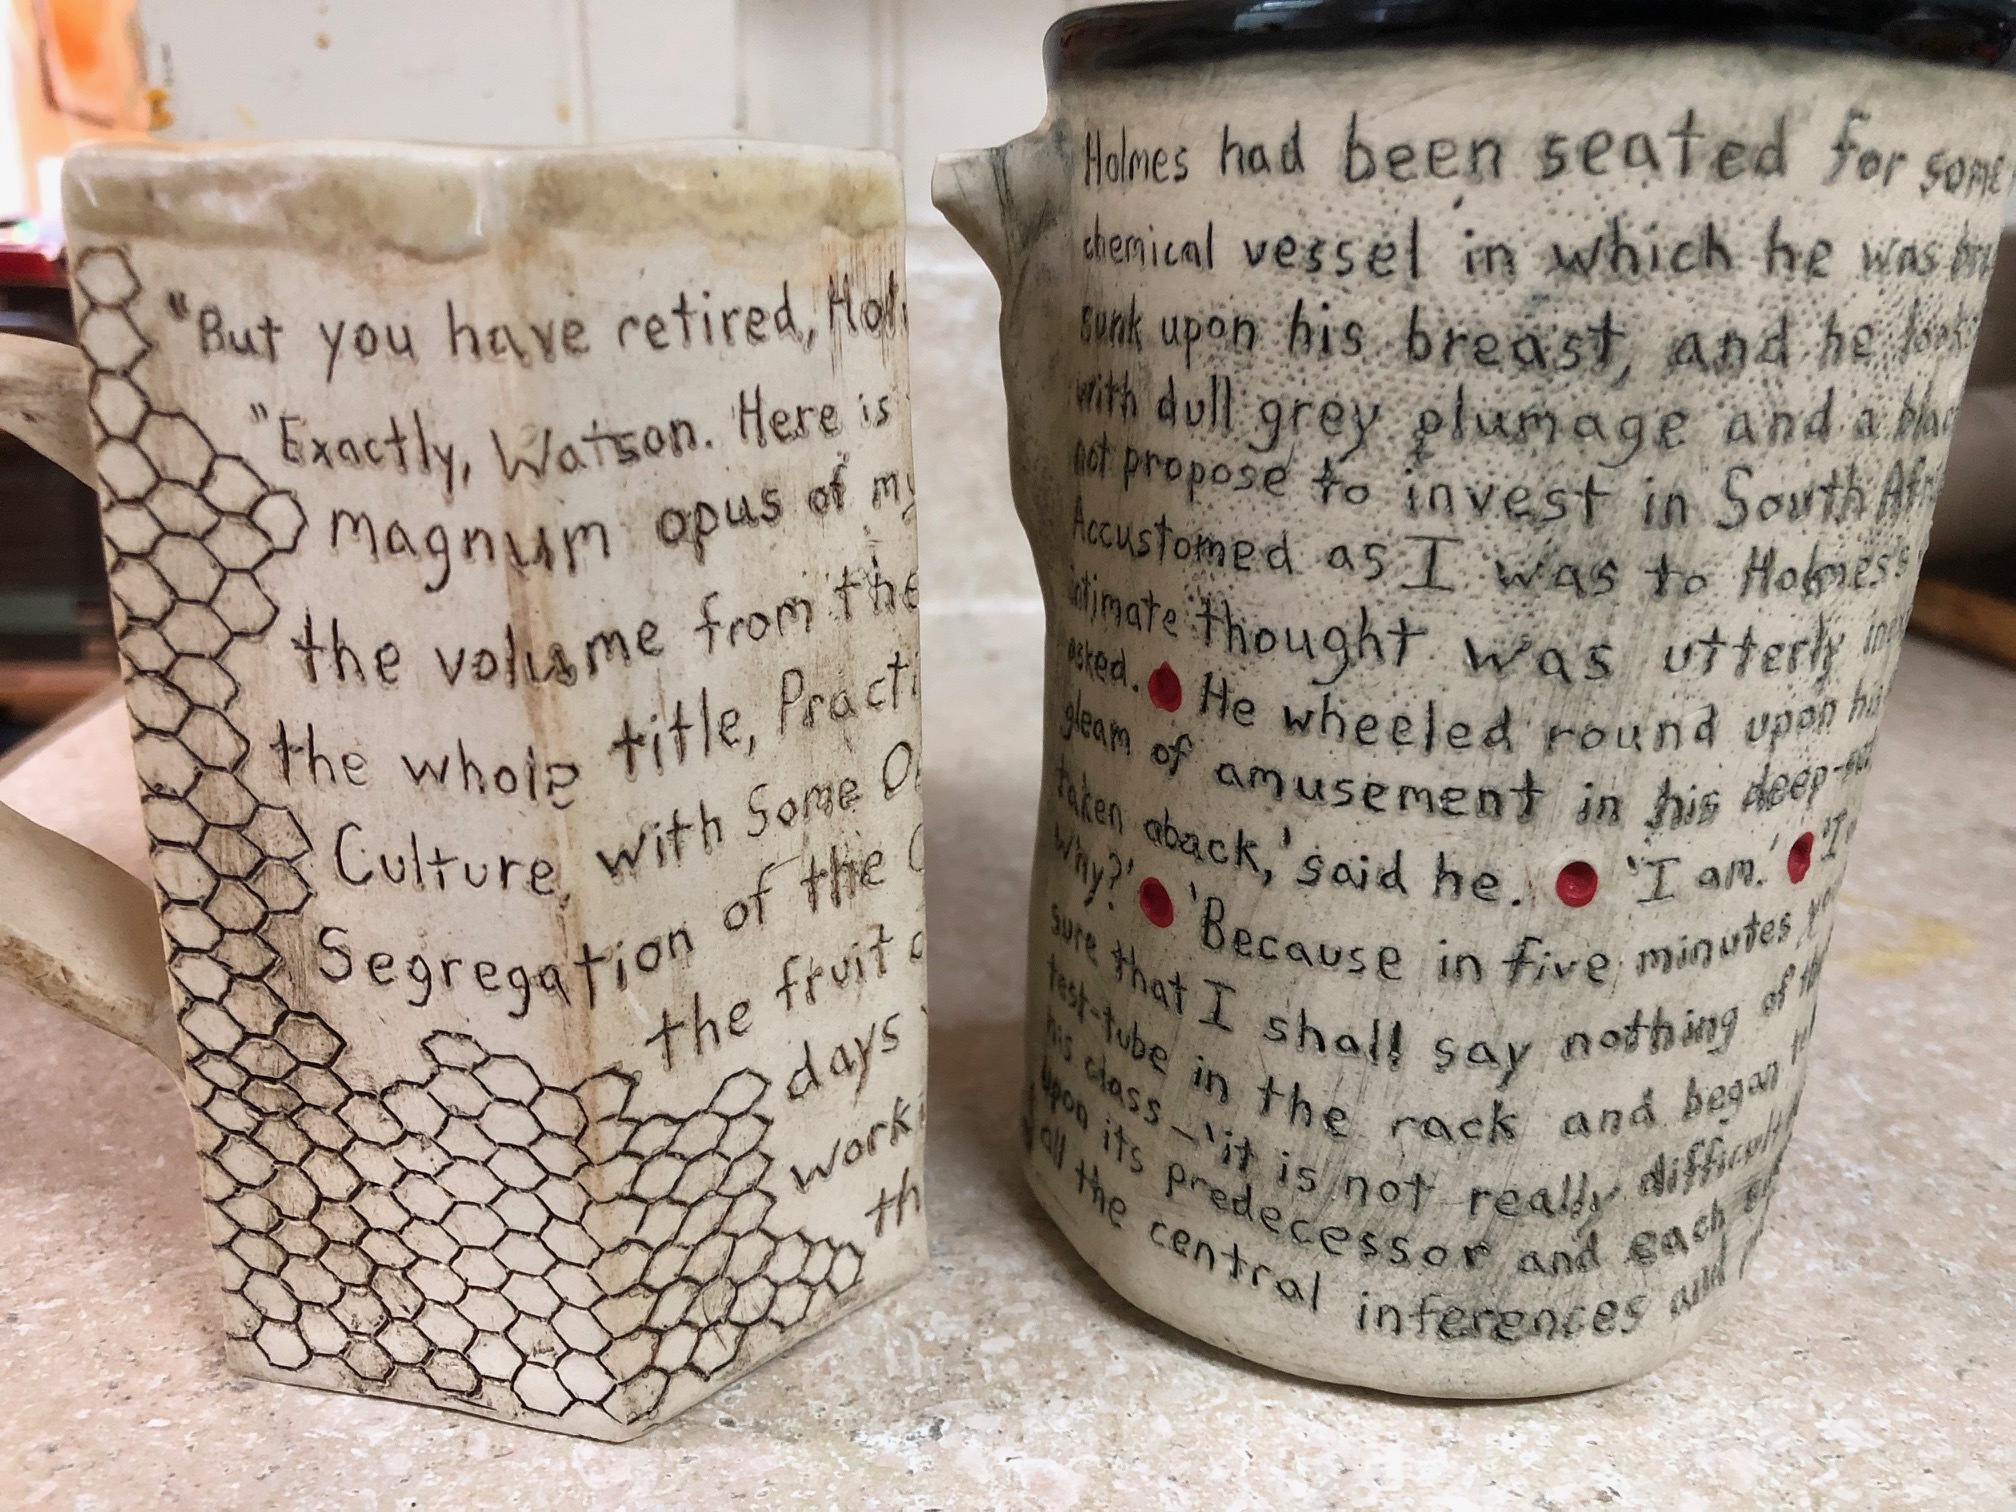
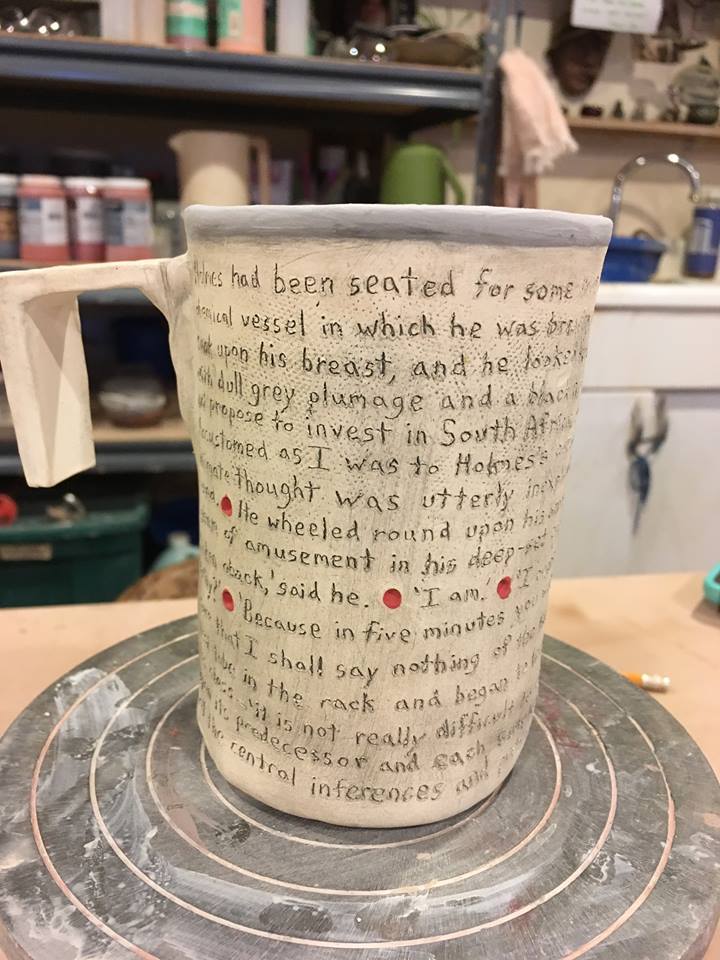
Next are the words. I took a passage from LAST about Holmes and his beekeeping. I let the words flow over the edges so it’s a continuous passage. The writing on this one is larger than my other mug. I didn’t have as much text and it didn’t seem as appropriate to be so small. My favorite spots are the where the edge of the honeycomb and words meet. I like how flowy it is.


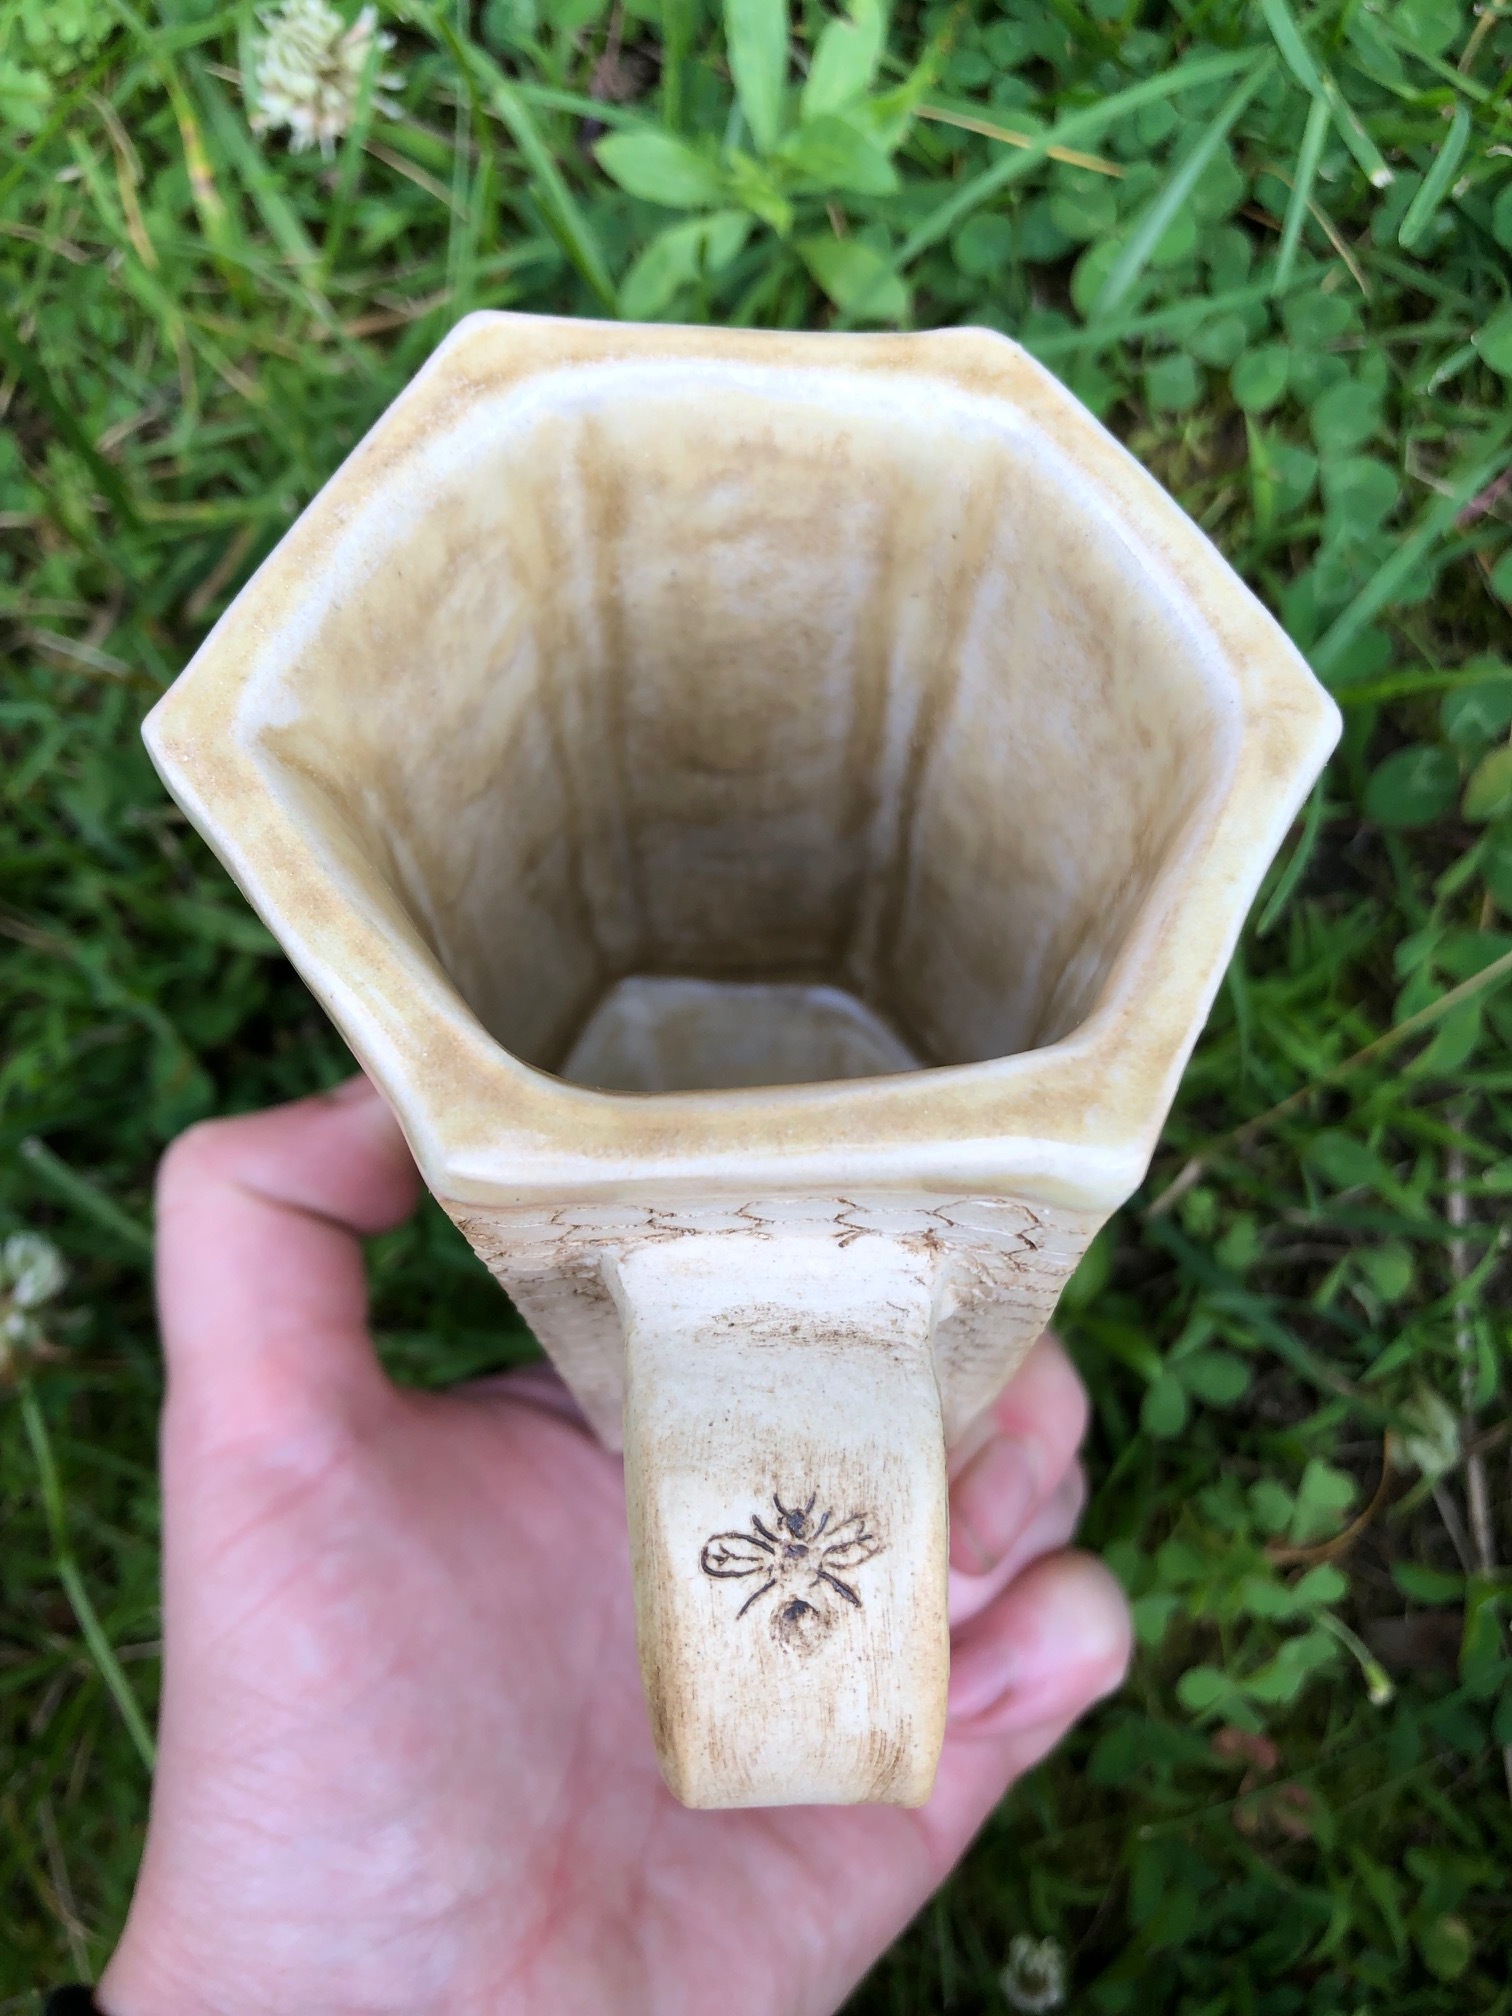
And I carved a bee. Of course, how can you have a honeycomb mug without a bee? It’s on the top part of the handle where the thumb would go.


I may have gone a little overboard with honeycomb inspiration, but I think the overall mug looks nice together. I generally like art that has lots of details, so this appeals to me.

The mug is currently drying and will need to survive its first firing. The outside will be stained a chocolate brown and the inside will have a brownish-yellowish glaze. I need to stop by the studio and see the glaze to make sure it’s what I’m picturing since I haven’t seen it in person yet.
mafief: (Default)

Done! The colors are exactly what I was picturing, and I’m really pleased with how it turned out. The outside is pleasantly rough and you can feel the texture from the letters I carved into the clay. The final product even caused a stir at the pottery studio when it was first stained because the letters popped. The mug survived the firing, but……


……did not survive use. The handle broke when it was gently placed in the dishwasher. All images were taken post-break and you can see the hairline break in the above shot pic. My mom and I decided it was due to the lack of glaze on the handle, thus making it weak. In the pic you can see another break forming where the handle attaches. So, grr and such is life with pottery. We dremmeled the sharp parts and I’m still using the mug. I have one dancing men left and a little bit of a bump. Considering what happened in the story, this ending is fitting.

I am probably going to try this mug again. Mom and I need to design a new handle and she’ll need to make it a little thicker. I still don’t want a clear glaze on the outside because I like the texture. Still more to do to perfect this particular design... But, that means I need to choose another section of text from the canon! Which is a good/bad thing since it took me a long time to choose last time.
mafief: (Default)
My mom and I both adore pottery. She has been taking pottery classes for around five years and getting pretty good. Below is one of her style of mugs. The handle was inspired by a tea cup from Azerbaijan and she’s been perfecting it. The outside is pressed with Queen Ann’s Lace and stained dark. The clay isn’t finished on the outside, so the surface is rough. The lip and inside are glazed robin egg blue and smooth.


The outside impression reminds of letters from the late 1800’s on parchment paper, which gave me an idea for a new mug. I wanted to write one of the Sherlock Holmes stories on the mug, stain the writing dark and have black inside glaze. Writing on clay is not easy, and I printed the words instead of using cursive. I’m very happy with myself that I kept things relatively straight, evenly spaced, and of similar size. Choosing the story and what line to write took longer than writing on the clay. In the end, I chose the beginning of The Dancing Men, because that domestic scene is one of my favorites. The dots represent paragraph breaks and will be filled with red to represent bullet holes (which I realize is a little gruesome, but oh well). I even got the little dancing men on the handle, because why not. ;)

Pre-writing. The sponge keeps the handle from drooping.


Post writing. Mug will need to dry completely and be fired


Post first firing after glazing and staining.


I love how this is coming out. The writing looks great and is exactly what I’ve been picturing. It’s still not done yet. We are waiting for the pottery studio artist to fire up her gas kiln. She doesn’t use it in the summer because it’s so hot.

Lastly, the best perk is collaborating with my mom on this project. :)

Profile

mafief: (Default)
mafief

July 2020

S M T W T F S
   12 34
567891011
12131415161718
19202122232425
262728293031 

Syndicate

RSS Atom

Most Popular Tags

Style Credit

Expand Cut Tags

No cut tags
Page generated Jun. 10th, 2025 09:24 am
Powered by Dreamwidth Studios